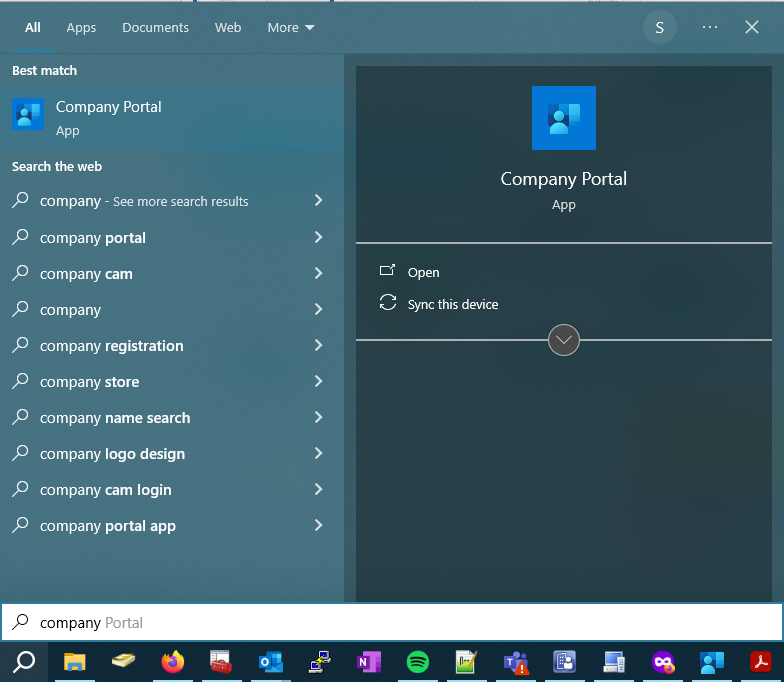
1) To install the CSE VPN on a NSCC issued device start by launching the Company Portal. The company portal is an app installed on any NSCC device and to find it click the search icon on the task bar and type the word “Company.”
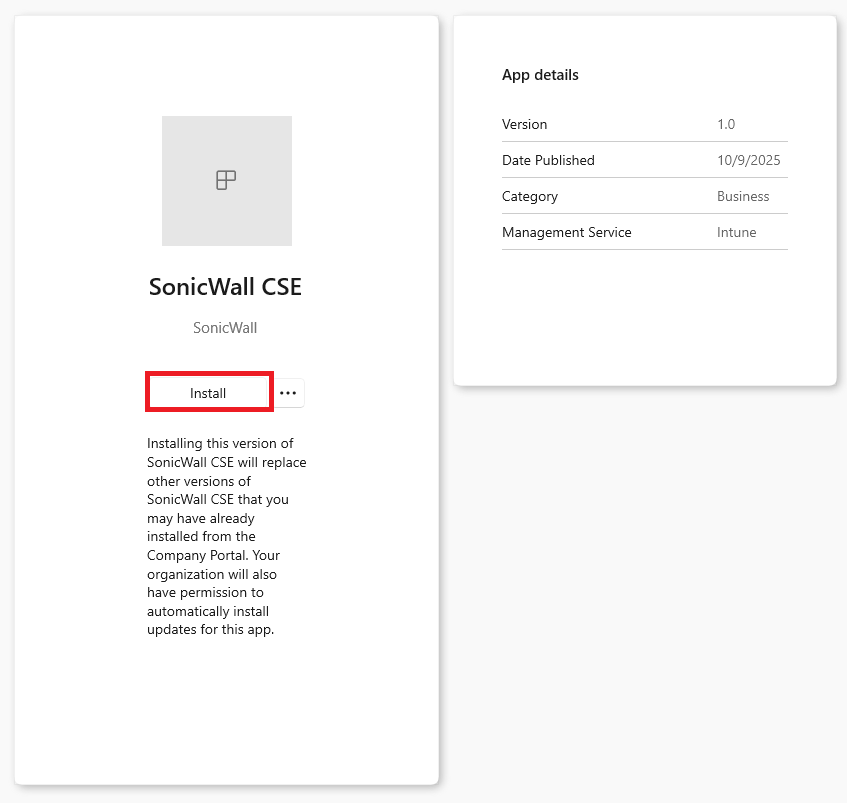
2) Within the Company Portal click on “Apps” and search for “SonicWall CSE”
3) Click on Install and the application will install on the NSCC device.
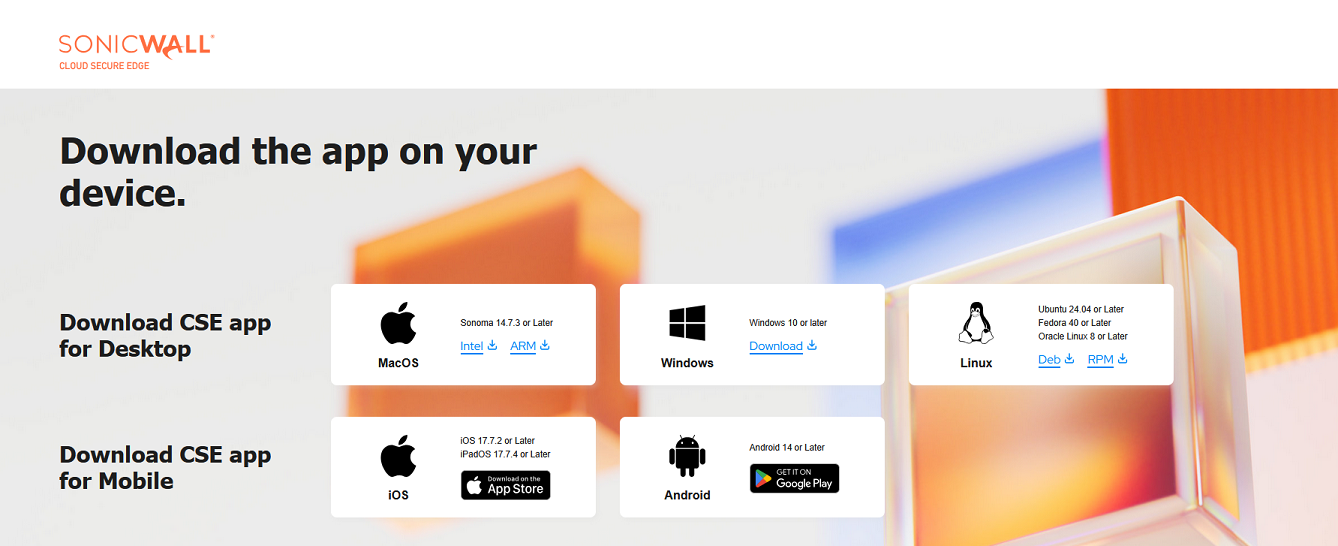
Cloud Secure Edge VPN Install Instructions - Personal Device
1. Click here to download the VPN app and select the option for the device you are downloading it to.
2. Run the file from where it was downloaded.
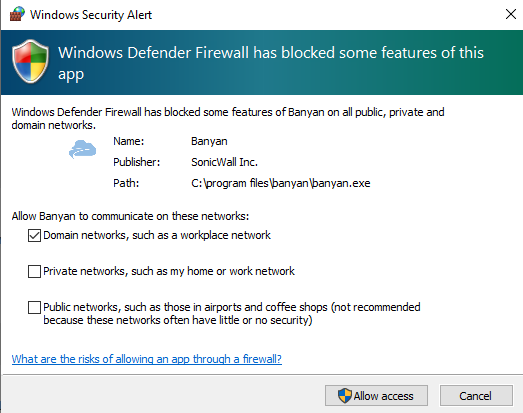
3. When the Windows Security Alert appears select the option to “Allow Access”
4. Once the CSE VPN has been installed it will request that you register your device. Do so by clicking the option to “Register”
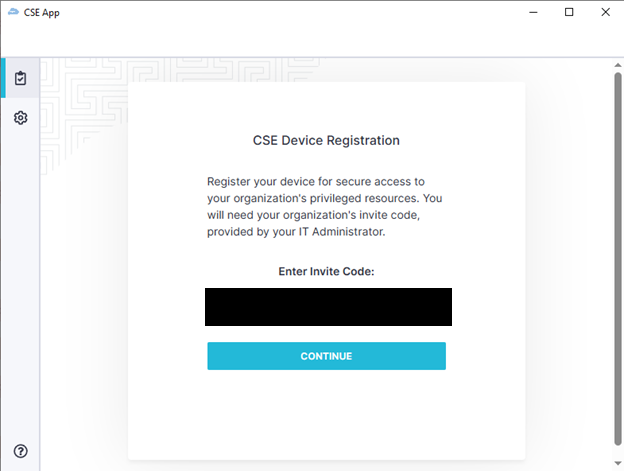
5. When prompted for an invite code enter the code provided to you by the Service Desk team.
6. This will open a web browser to sign you into your NSCC email account. Once signed in verify using your Multi-Factor Authentication.
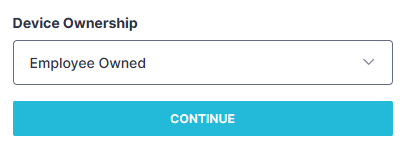
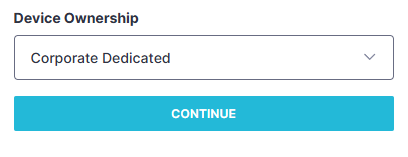
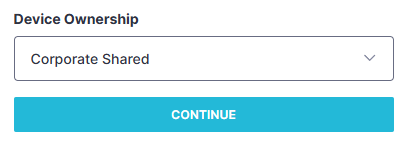
7. Select the type of device that the VPN is being installed on using the below descriptions.
For a personal device that was not issued by NSCC select the option for “Employee Owned.”
For a NSCC issued device that is not shared by any other employees select the option for “Corporate Dedicated.”
For NSCC issued devices that are shared by multiple users select the option for “Corporate Shared.”