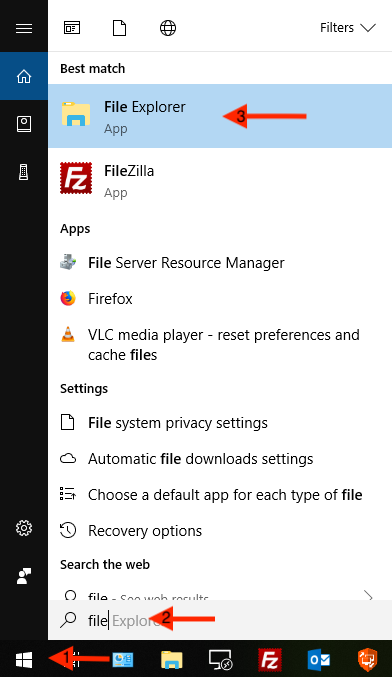
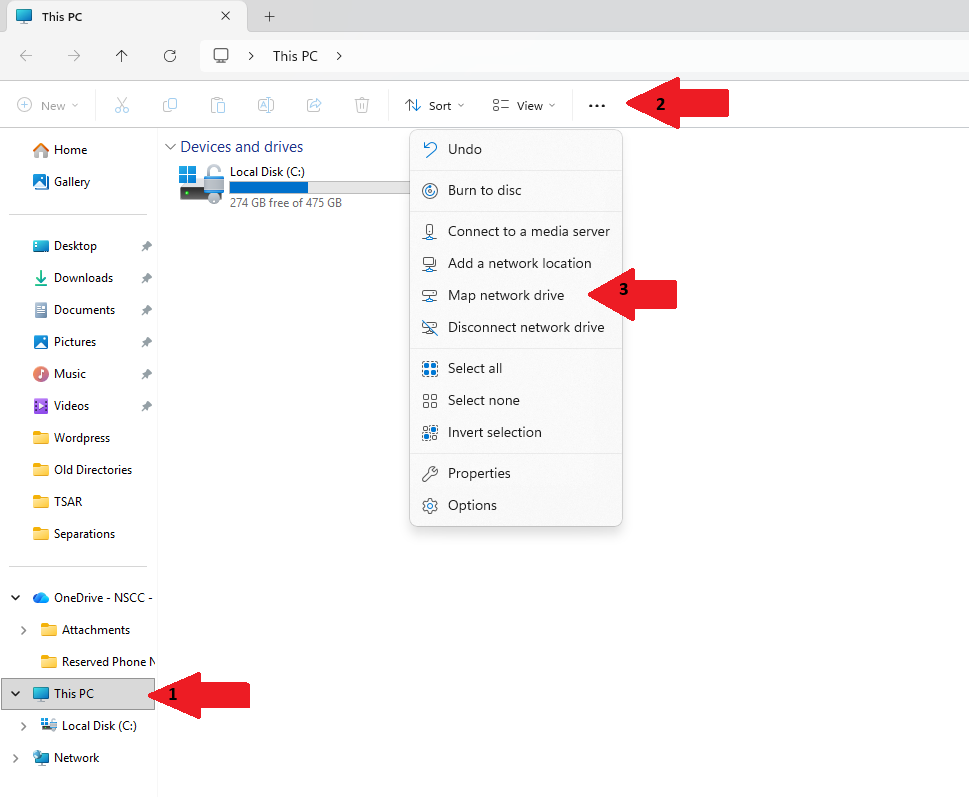
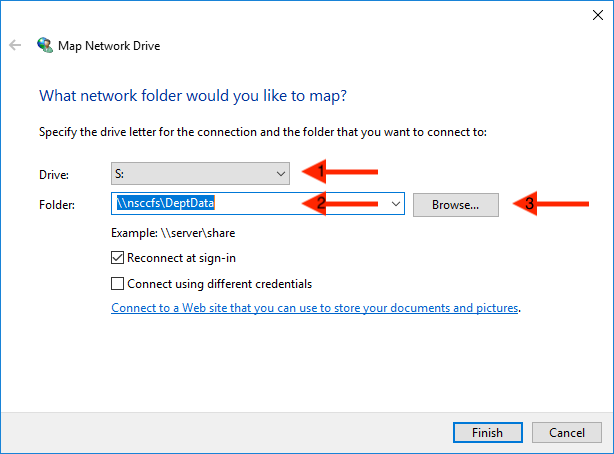
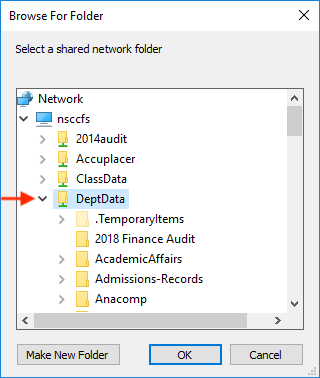
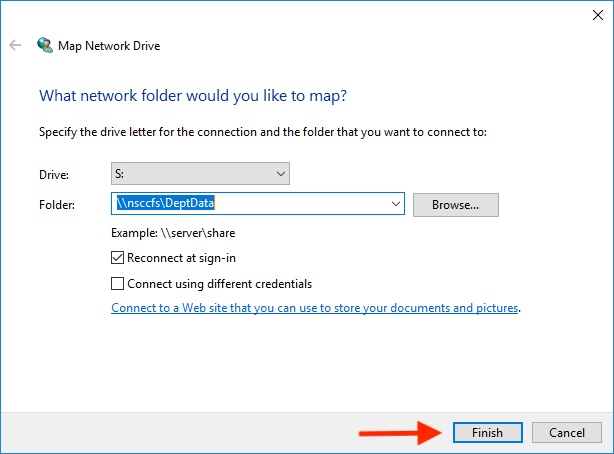
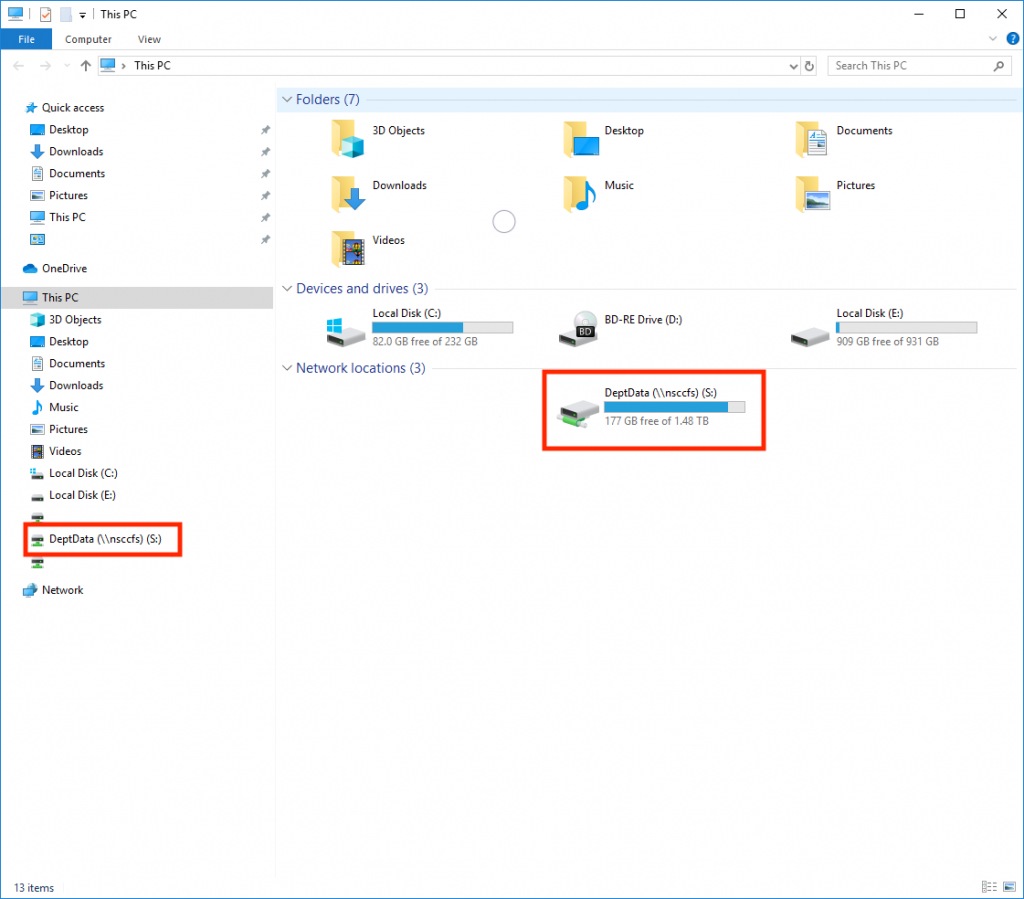
Map Department Share Skip to main content How Can We Help? Search Map a Department Share (Windows) 1. Click on the Windows Start button2. Type “file explorer” 3. Click on the File Explorer application 1. Click on “This PC” on the left side of the window followed by clicking the 3 dots in the top of the page. 2. Click on the text for “Map network drive” 1. Choose your drive letter. We recommend using “S:”2. Type “\\nsccfs\DeptData” in the folder path3. Click browse if you would like to map a specific folder→ Click “Finish” if you would like to map the entire share directory 1. Expand the DeptData folder2. Find the department share folder that you want3. Click on the folder to highlight it4. Click “OK” 1. The folder path will populate with the particular folder that you have chosen2. Click “Finish” Your mapped shared drives will now appear in File Explorer under “This PC”
Map a Department Share (Windows) 1. Click on the Windows Start button2. Type “file explorer” 3. Click on the File Explorer application 1. Click on “This PC” on the left side of the window followed by clicking the 3 dots in the top of the page. 2. Click on the text for “Map network drive” 1. Choose your drive letter. We recommend using “S:”2. Type “\\nsccfs\DeptData” in the folder path3. Click browse if you would like to map a specific folder→ Click “Finish” if you would like to map the entire share directory 1. Expand the DeptData folder2. Find the department share folder that you want3. Click on the folder to highlight it4. Click “OK” 1. The folder path will populate with the particular folder that you have chosen2. Click “Finish” Your mapped shared drives will now appear in File Explorer under “This PC”